


If you have ever worked with Azure Active Directory, you most likely know some of the pain you have to go through to find the right kind of authentication to use for your application. There are so many authentication flows and grants to choose from. It has to be said that Microsoft has done a phenomenal job at writing documentation about all OAuth 2.0 grants and flows and about all the components that work together to achieve that sweet 200 HTTP status.
But there are some token grant and flow variations that work with certificates (or federated credentials), that use the so-called "client assertion" parameter. These variations are among the more challenging. I have been asked about this parameter so many times by fellow developers that I have decided to write a blog post about it.
Here comes MSAL...
Good news, the Microsoft Authentication Library has made authentication with certificates a piece of cake. You now only need one line of code. That's it!
This article will cover the C# side of things, of course many other programming languages have MSAL as well, but the implementations might differ.
First things first, you need a certificate. For this example I am going to use a self signed certificate.
Easily create a self signed certificate
Some of you may be thinking: "Why elaborate on such a simple task?". Well, I know from experience that most people, myself included, forget how to create a certificate, always, because you rarely do it. You can of course skip this section if you already have a valid certificate.
So, here is a simple method I learned to create those sacred self signed certificates.
First install OpenSSL, this tool is gold and I want to let you know that you can donate to the creator.
Cool thing I have learned to use is the Path environment variable on Windows. After installing OpenSSL, open the environment variable dialogue and find the system variable "Path". Next --> Edit --> New --> Add the installation path of OpenSSL; in my case it was C:\Program Files\OpenSSL-Win64\bin. Now you can use OpenSSL in CMD from anywhere on your PC.
Second, open command prompt to create an X509 certificate with OpenSSL. You can use this command:
openssl req -x509 -newkey rsa:4096 -sha256 -keyout key.key -out cert.crt -days 600
Next, use this command to combine .crt and .key files.
openssl pkcs12 -export -out fullcert.p12 -in cert.crt -inkey key.key
Now, open the .p12 file and install the certificate in your certificate store. Important: Make sure to mark the key exportable there is a setting in the installation dialogue!
In your certificate store, find the certificate and export it as .cer, the public key version for Azure AD, and as .pfx for your code project. (you can also use the .p12 directly if you want)
That's it, certainly not the fastest or most efficient way, but a way that works.
Let's get to business, first stop Azure AD
Head over to your Azure AD app registration you want to use for authentication. In the overview section copy Application ID and Directory ID, you will need those in the code.
Next go to:
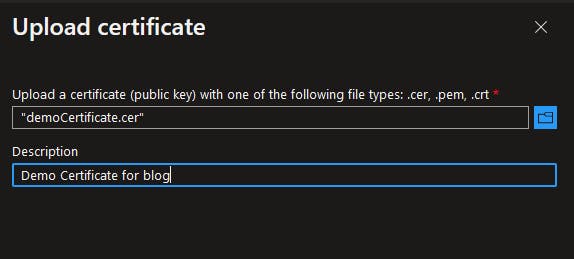
Certificates & secrets --> Certificates --> Upload certificate
And upload your certificate's public key.
That is it from the Azure AD side of things, of course there are API permissions, redirect URLs and so on that you need to configure for your specific scenarios, I cannot cover in this article.
The one-liner
As an example, let's create a console application. The code is so simple that everything can be done in the Program.cs class.
Here it is, the code you have been skipping to, probably:
var clientId = "client_id";
var tenantId = "tenant_id";
var pathToCertificate = "path_to_cert";
var certificatePassword = "cert_pw";
var x509 = new X509Certificate2(pathToCertificate, certificatePassword,  X509KeyStorageFlags.Exportable | X509KeyStorageFlags.PersistKeySet);
Now, this is what you have been waiting for:
var app = ConfidentialClientApplicationBuilder.Create(clientId)
                                          .WithCertificate(x509)
                                          .Build();
And just like that, you have successfully created a ConfidentialClientApplication that can generate access tokens via your certificate. Here is a very basic example of generating an access token just to show that it works:
//Can be any scope (SharePoint, etc.)
var scopes = new string[]{"https://graph.microsoft.com/.default"};
var result = app.AcquireTokenForClient(scopes)
.WithTenantId(tenantId)
.ExecuteAsync().Result;
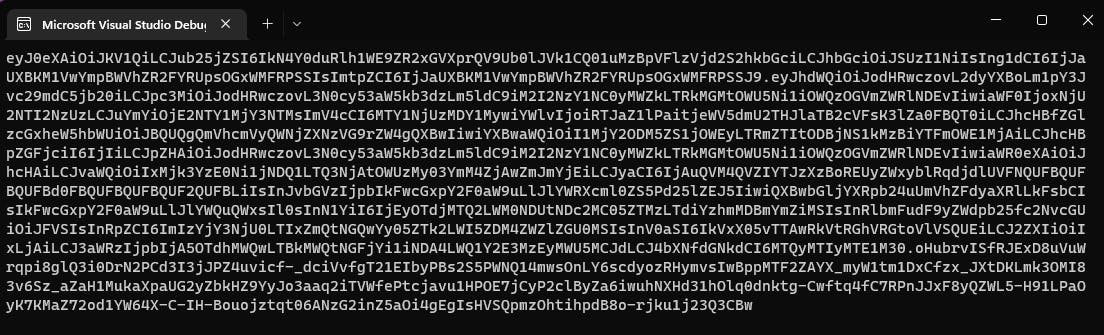
Console.WriteLine(result.AccessToken);
The result looks like this.
 Congratulations, you have successfully generated an Azure AD access token with a certificate. See how easy this is! This approach is recommended by Microsoft and is also the easiest.
The "long" way
Now there are scenarios where you cannot use the .WithCertificate() method. If you find yourself in this scenario, follow this section.
First of all, it is recommended to use the Microsoft.IdentityModel.JsonWebTokens library, since it reduces the lines of code drastically. However, if you need a way to do this without this library, refer to this Microsoft article. It describes both methods.
In the application create a helper class, say ClientAssertionHelper.cs. This class will have one method and one method only, which looks like this:
public static string GetSignedClientAssertion(X509Certificate2 certificate, string tenantID, string clientID)
{
    string aud = $"https://login.microsoftonline.com/{tenantID}/v2.0";

    string confidentialClientID = clientID;

    var claims = new Dictionary<string, object>()
    {
        { "aud", aud },
        { "iss", confidentialClientID },
        { "jti", Guid.NewGuid().ToString() },
        { "sub", confidentialClientID }
    };

    var securityTokenDescriptor = new SecurityTokenDescriptor
    {
        Claims = claims,
        SigningCredentials = new X509SigningCredentials(certificate)
    };

    var handler = new JsonWebTokenHandler();
    var signedClientAssertion = handler.CreateToken(securityTokenDescriptor);
    return signedClientAssertion;
}
Now in your Program.cs class, with the same variables as before, use the method like this.
var app = ConfidentialClientApplicationBuilder.Create(clientId)
                                          .WithClientAssertion(ClientAssertionHelper.GetSignedClientAssertion(x509, tenantId, clientId))
                                          .Build();
And voilà, this ConfidentialClientApplicationBuilder will behave the same way as the one we have created in the previous chapter. Again, super easy! You can even save the client assertion you get from the GetSignedClientAssertion() method to Azure Key Vault or similar services for future use.
Conclusion
Using client assertions in your Azure AD authentication can be quite intimidating. But fortunately, there are easy ways to get those flows and grants running with virtually no code required.
References
The code snippets from this article were mostly taken from this Microsoft article:
https://docs.microsoft.com/en-us/azure/active-directory/develop/msal-net-client-assertions
All OAuth 2.0 grants and flows can be found here:
https://docs.microsoft.com/en-us/azure/active-directory/develop/v2-oauth2-auth-code-flow
You can find out more about using MSAL to get access tokens here:
https://docs.microsoft.com/en-us/azure/active-directory/develop/msal-authentication-flows